「ロボット・電子工作・マイコン」カテゴリーアーカイブ

【Raspberry Pi Pico W】WiFi UDP通信 サンプルプログラム

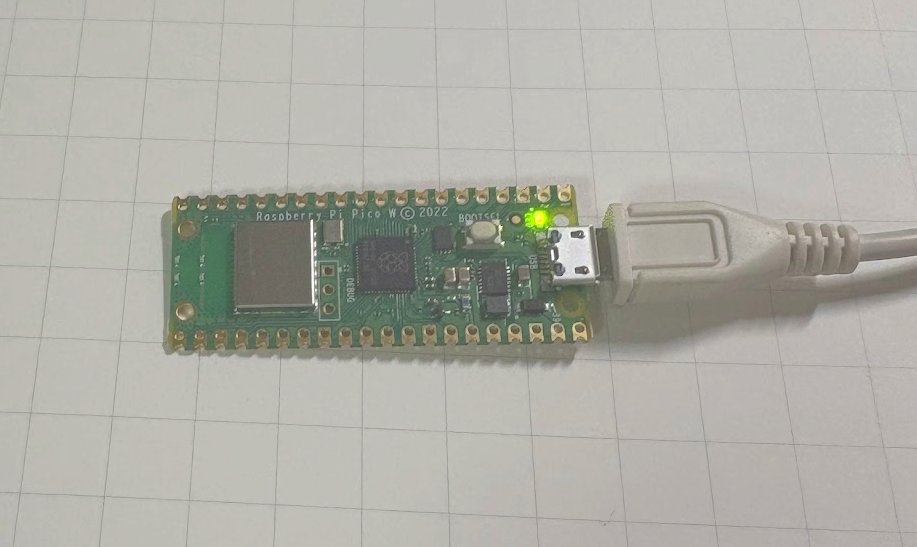
Raspberry Pi Pico W で WiFi UDP通信するサンプルプログラムを作成しました。
EarlePhilhower版 Arduino環境です。
バイナリデータを受信して、そのまま送信します。


// Pico WでWIFI(UDP)
// ※バイナリデータを送受信

#include <WiFi.h>
#include <WiFiUdp.h>

const char *SSID = "xxxxxxxxxx";     // WiFi環境に合わせて書き換える
const char *SSID_PASS = "xxxxxxxxx"; // 同上

// IPを指定する場合
const IPAddress LOCAL_IP(192, 168, 0, 2);
const IPAddress SUBNET(255, 255, 255, 0);
const IPAddress GATEWAY(192, 168, 0, 1);    // 不要な場合はLOCAL_IPと同じにする
const IPAddress DNS(192, 168, 0, 1);

const unsigned int LOCAL_PORT = 56789;     // 受信ポート

//IPAddress DEST_IP(255, 255, 255, 255);  // 送信先IP(ブロードキャスト)
const IPAddress DEST_IP(192, 168, 0, 3);  // 送信先IP
const unsigned int DEST_PORT = 56789;      // 送信先ポート

#define BUF_SIZE 1400   // 1400バイト以上は分割して送信すること

WiFiUDP udp;

void setup() {
  Serial.begin(115200);
  while (!Serial){};
  pinMode(LED_BUILTIN, OUTPUT);

  // IPを指定する (DHCPで割り当てられる場合は不要)
  WiFi.config(LOCAL_IP, DNS, GATEWAY, SUBNET);

  WiFi.begin(SSID, SSID_PASS);
  while (WiFi.status() != WL_CONNECTED) {
    Serial.print('.');
    delay(500);
  }
  Serial.print("Connected! local IP: ");
  Serial.println(WiFi.localIP());

  udp.begin(LOCAL_PORT);
}

uint16_t count = 0;

void loop() {
  // UDP受信
  int packetSize = udp.parsePacket();
  if (packetSize > 0) {
    //Serial.printf("Received packet size:%d from:%s:%d to %s:%d\n", 
    //  packetSize, 
    //  udp.remoteIP().toString().c_str(), udp.remotePort(), 
    //  udp.destinationIP().toString().c_str(), udp.localPort());

    uint8_t recvBuffer[BUF_SIZE];
    int recvSize = udp.read(recvBuffer, BUF_SIZE);
    for (int i = 0; i < recvSize; i++) {
      Serial.print(recvBuffer[i]);
      Serial.print(',');
    }
    Serial.println();

    // UDP送信用データ準備
    char sendBuffer[BUF_SIZE];
    for (int i = 0; i < recvSize; i++) {
      sendBuffer[i] = recvBuffer[i];
    }

    // UDP送信
    udp.beginPacket(DEST_IP, DEST_PORT);
    udp.write(sendBuffer, recvSize);
    udp.endPacket();

    count++;
  }

  digitalWrite(LED_BUILTIN, count % 2);
}

■Raspberry Pi Picoの関連記事
【Raspberry Pi Pico W】WiFi UDP通信 サンプルプログラム
Raspberry Pi Pico+Arduinoでサーボをたくさん動かしたい
会話ができる「ぴよロボ」作りました! (Raspberry Pi + Pico + ChatGPT)
Raspberry Pi Pico W でPCとBluetooth(シリアル)接続する
Raspberry Pi Pico/Pico WをArduino開発環境で使うためのメモ
超音波距離センサー + Raspberry Pi Picoで潜水艦ソナー風
コップの水がこぼれない台 MPU6050 + Raspberry Pi Pico(Arduino)
MPU6050 + Raspberry Pi Pico(Arduino) -> PCで3Dのキューブを回転表示

2軸 逆運動学(IK) Pythonサンプル

2軸の回転関節を持つロボットアームの関節角度を解析的に解く逆運動学(IK)のPythonサンプルを作成しました。

計算式は▼を参考にさせていただきました。
2リンクモデルの逆運動学を求める!順運動学の式から算出する方法


# 2軸 IK Test
# 2joint_ik_test.py 
# 【参考】 https://tajimarobotics.com/kinematics-two-link-model-2/

import math
import tkinter

SCREEN_WIDTH = 400
SCREEN_HEIGHT = 400

L1 = 0.4
L2 = 0.6

def draw(x, y):
    global canvas

    print('x, y:', x, y)

    t1_sub1 = math.atan2(y, x) 
    t1_sub2 = math.acos((L1 ** 2  - L2 ** 2 + x ** 2 + y ** 2) / (2 * L1 * math.sqrt(x ** 2 + y ** 2)))
    t1_0 = t1_sub1 + t1_sub2

    t2_0 = math.atan2(y - L1 * math.sin(t1_0), x - L1 * math.cos(t1_0)) - t1_0

    print('t1, t2:', t1_0, t2_0)

    x2 = math.cos(t1_0) * L1
    y2 = math.sin(t1_0) * L1

    x3 = x2 + math.cos(t1_0 + t2_0) * L2
    y3 = y2 + math.sin(t1_0 + t2_0) * L2

    canvas.delete('L1')
    canvas.delete('L2')

    cy = SCREEN_HEIGHT / 2
    canvas.create_line(0, cy, x2 * SCREEN_WIDTH, -(y2 - 0.5) * SCREEN_HEIGHT, fill = "white", width=4, tag='L1')
    canvas.create_line(x2 * SCREEN_WIDTH, -(y2 - 0.5) * SCREEN_HEIGHT, x3 * SCREEN_WIDTH, -(y3 - 0.5) * SCREEN_HEIGHT, fill = "red", width=4, tag='L2')

    canvas.pack()

def canvas_move(event):
    global mouse_press
    if not mouse_press:
        return
    
    #print("clicked at ", event.x, event.y)
    y = 1 - event.y / SCREEN_HEIGHT - 0.5
    #print("y:", y, -(y - 0.5) * SCREEN_HEIGHT)
    draw(event.x / SCREEN_WIDTH, y)

def canvas_press(event):
    global mouse_press
    mouse_press = True
    canvas_move(event)

def canvas_release(event):
    global mouse_press
    mouse_press = False

# ======================
# メイン
# ======================
if __name__ == "__main__":

    # ウィンドウ初期化
    root = tkinter.Tk()
    root.title(u"2軸 IK Test")

    root.geometry(str(SCREEN_WIDTH) + "x" + str(SCREEN_HEIGHT))   # ウインドウサイズを指定

    canvas = tkinter.Canvas(
        root,
        width = SCREEN_WIDTH,
        height = SCREEN_HEIGHT,
        bg = "black"
    )
    canvas.pack()

    canvas.bind("", canvas_press)
    canvas.bind("", canvas_release)
    canvas.bind("", canvas_move)
    mouse_press = False

    cy = SCREEN_HEIGHT / 2
    canvas.create_line(0, cy, SCREEN_WIDTH, cy, fill = "green", tag='line')

    root.mainloop()